


<< Previous diary post on the BP-build
Notes to myself on the main experiences gained
during the Black Pearl 2018 building project
Below, I have compiled my observations and thoughts from the project, kind of a summary of things I want to remember when taking on future projects.
Primarily for my own sake in order to avoid re-doing the same mistakes and inconveniences, but it might also be helpful for other first time builders, giving them a chance to dodge some potential pitfalls. Metaphorically speaking that is, I don’t think dodging is the best way of avoiding a pitfall.
Preparations
I believe there is much to be gained in building time as well as the quality of the final result if you apply some accuracy in the manufacturing of the strips:
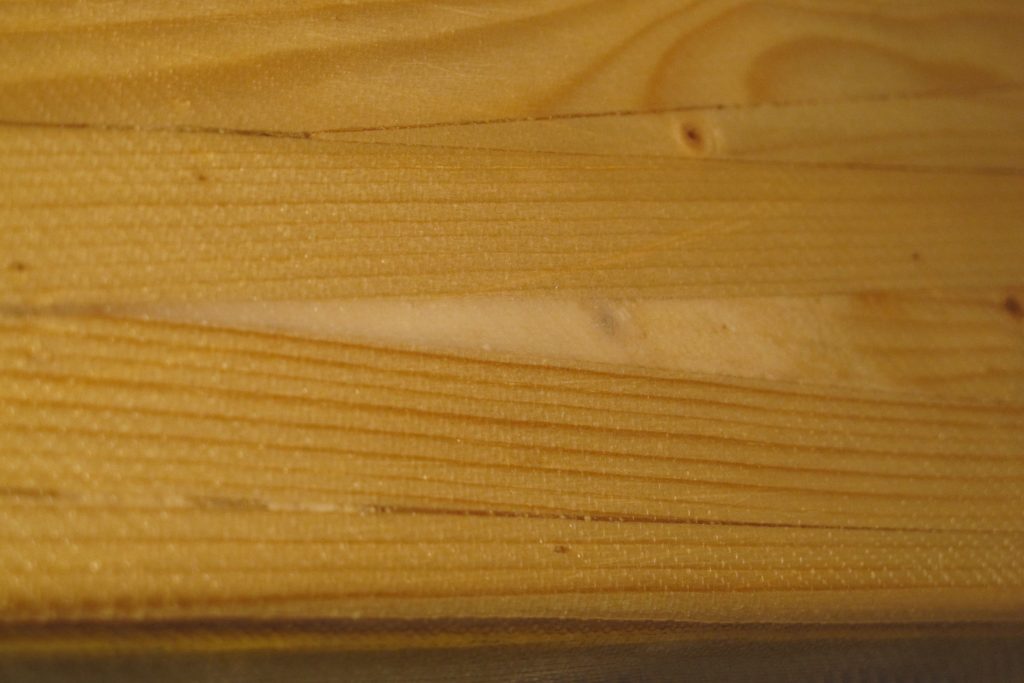
The sawed flat side of the raw material, i.e. the board to be split, makes the edges of the strips quite rough, which in turn results in that the surfaces to be glued together will be uneven, creating rifts that will require filling with epoxy putty later on. This should be easy to prevent by planing the sawed flat side of the board before splitting it into strips, something that most lumber yards can assist with.
Amendment 2019-07-02: I had a conversation with Björn about this, he doesn’t disagree, but he adds the consideration that if the edges of the strips are made too smooth this would increase their tendency to pop out of position prior to beeing glued since this smoothness would reduce the friction between them.
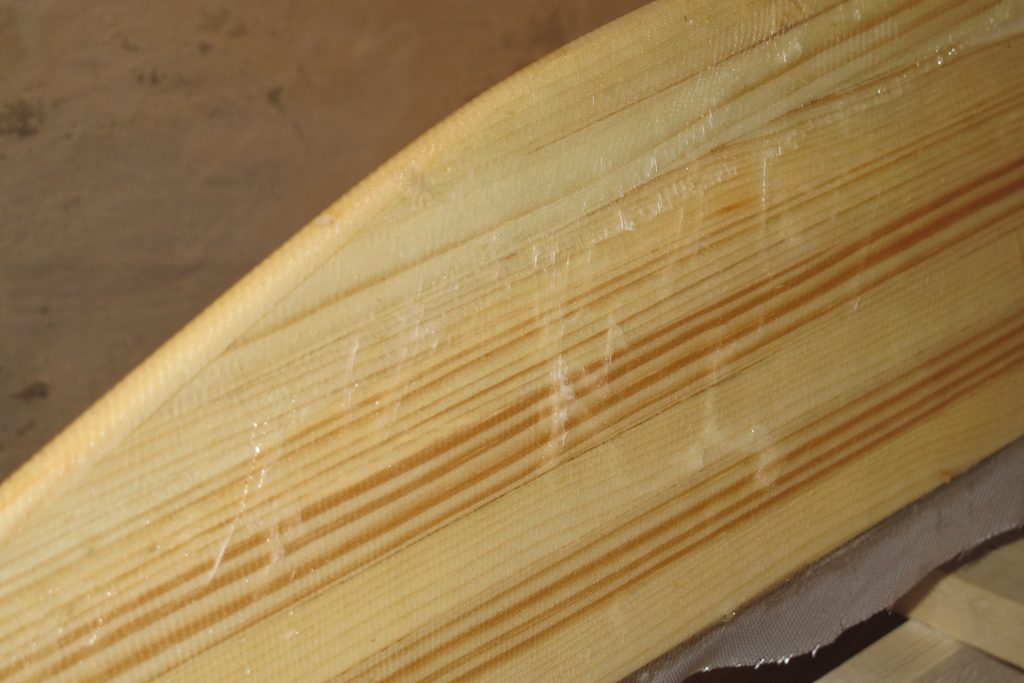
It is also a good idea to select boards which are not skew in their cross section, since a concave/convex surface makes it difficult to create good strips.
The sole of the circular saw doesn’t get a plane surface to follow, but tilts one way or the other depending on the curvature of the board. This results in strips of uneven thickness and having cross sections that are not square.
If you don’t find plane boards, the planing of the boards mentioned in the previous section will come in handy for solving also this problem, provided they are not skew to an extent where you have to plane away too much of the thickness of the board, resulting in very narrow strips and a lot of shavings waste.
I found a blade to my cordless circular saw with sufficiently sized teeth for working along the grain, but fine enough to create a reasonably smooth cut for avoiding excessive sanding in a later stage.
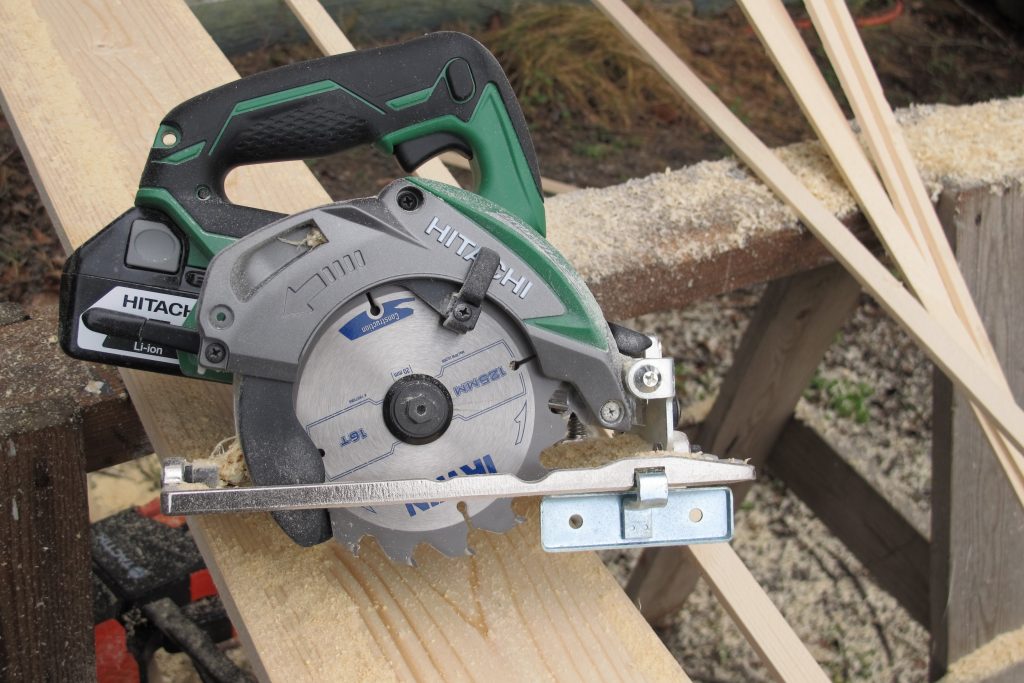
Now I must get myself some additional batteries to avoid frequent breaks for charging.
Stripping
In my opinion, it is worthwhile to plan and get a feel for the remainder of the stripping as soon as the sheer strips are in place. The forward planning is too shortsighted if merely thinking of the next one or two strips, since any upcoming difficulties should be anticipated as early as possible in order to open up more options for preventing them.
Staple temporary strips in critical positions, for example where distinct bends or twists are necessary, especially if both are needed simultaneously.
Evaluate and create a strategy for how to place the strips.
How to orient them, bend them, twist them for the best result.
How they should meet with each other to create adequate lines.
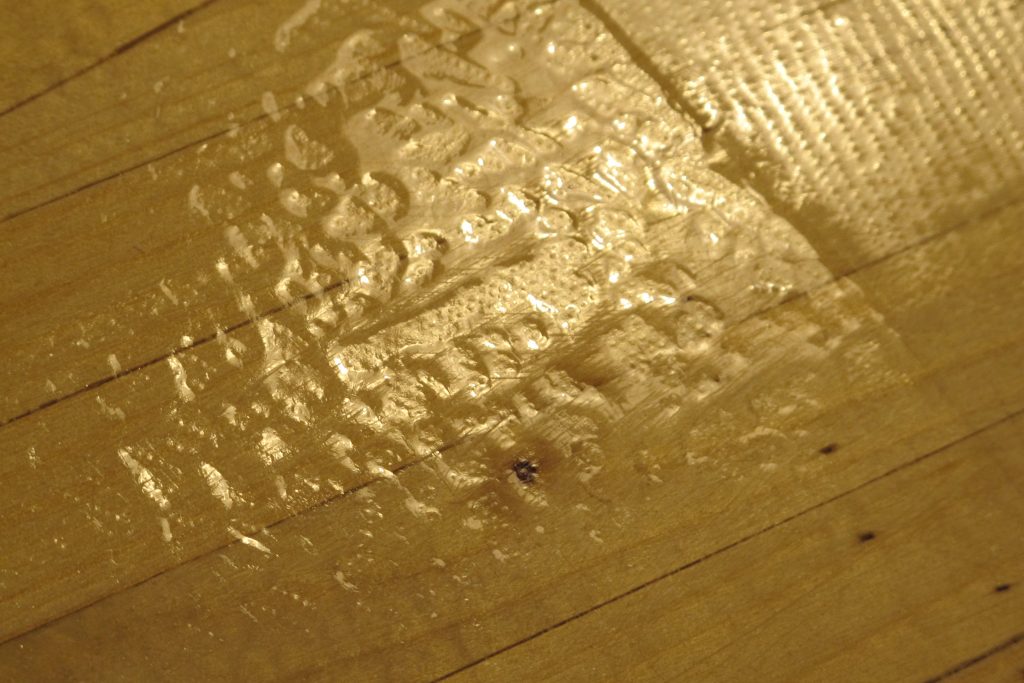
Removing epoxy from the hull after glueing was a quite, not to say extremely, tedious work. Furthermore, it seems somewhat unnecessary since the epoxy is only needed between the strips, but to get it there you have to apply it over the entire hull, just to scrape/sand most of it away after curing.
Possibly, I will try to glue each strip individually with white glue next time to avoid the epoxy mess. This would require the strips to be bevelled to get a tight fit since white glue is not filling. More work during the striping phase, but on the upside you get narrower and therefore less visible joints, and less sanding work since any white glue leaking out is much easier to remove than a homogeneous layer of epoxy.
Besides, it feels much more interesting from a carpenter’s point of view to put more effort into the woodwork than on removing epoxy you just recently painted there.
Amendment 2019-07-02: After I tried the good old paint scraper for removing epoxy and even coarsely ”sanding” the stripped hull, I do not see this as such a big problem any more so the white glue might remain in the cupboard..
For the same reason, avoiding slapping on unnecessary epoxy, I will at some future project try using hot-melt glue instead of staples. Even if the staple holes are small, they are located densely over the entire surface, leading to 99% of it being covered in epoxy when filling these holes. And avoiding the marks after the filled holes would also be aesthetically favourable if you intend to use transparent varnish and not opaque paint as a top layer.
It is a really, really good idea to avoid strips levelling below the surrounding ones, caused for instance by them beeing thinner than the others or that they have been pushed down slightly between the forms. If one single strip is lower, you have to sand down all the rest of them to that level, which takes lots of time as well as unnecessary effort, and in addition decrease the thickness of the stripping, reducing the strength of the kayak.
If you find a strip too low, the best thing to do is probably to glue another piece of strip on top of the low one, and then scrape/sand it down to adequate height. To fill out the void with epoxy putty complicates sanding since it is easier to sand wood than epoxy and consequently the result would likely be uneven.
Furthermore, I find it somewhat tricky to do epoxy fillings, it does not want to fill sufficiently and most often I have to do one, or even two, more renewed fillings before completely levelling the surface. But that is probably just me haven’t learned the trick yet.
If on the other hand an occasional strip is higher then the surrounding ones, this is quite easy to sand down to the correct height, one strip presents a much lesser surface to sand than all the rest of them together. But on the inside of the hull, the same strip will probably be low, requiring some fixing. Not that an even surface is equaly important on the inside from aestethical reasons, but it would probably lead to air bubbles underneath the fibre glass.
Sanding
Staple holes, wide strip joints and other flaws that might be deep but having a very small propagation over the surface area is best filled before sanding is started so that they can be sanded with the entire surface. When cured, scrape away excessive epoxy before sanding, this till prevent the paper from getting clogged.
Shallow flaws with larger surface area (such as damages caused by the circular saw and similar) is however most likely simpler to fill when the course sanding (40-/60-paper) is entirely finished and after the inital parts of the medium sanding (80-paper).
It is not until then you really can determine the spots where filling is actually required, which is often fewer than initially anticipated, and sanding is significantly simpler the fewer and smaller epoxy surfaces are included. If you in an early stage fill shallow flaws prematurely, it often ends up with having removed it all by sanding anyway.
Consequently, flaws shallower than approximately 0,5 mm should be sanded away rather than filled. Often, when bored from sanding, you imagine that filling would be the easy way out compared to sanding, which it seldom is. The amount of sanding required after filling is usually even greater.
Epoxy and fibreglass
Cut fibreglass
One of the two major experiences of never-do-this-ever-again during this my first building project was that the fibre glass was so inclined to split up into fringes when cut into ribbons for reinforcing the keel or similar. It became a complete mess of fibre threads and lumps embedded in epoxy that required loads of scraping and sanding efforts to fix, not to mention all the extra work hours.
Later on, when I fixed some air bubbles with small glass patches, the following rules turned out to make the work considerably more successful:
- I treat the cut fibre glas with very gentle hands, if it is fringed already before I get it on the kayak I have lost before I have even begun. Furthermore, the ribbons very easily stretch and loose their shape when handled carelessly, which makes them that more difficult to get into the right place.
- If I am to laminate a piece of cut glass larger than a couple of decimeters onto epoxy that is still sticky, I roll it onto a cardboard tube or similar to get better control when laying it out. Once it has adhered to the underlying epoxy it is impossible to adjust without deformation and fringing so its well worth any effort to get it correctly positioned at the first attempt.
- If I lay out cut glass on a dry surface, such as an earlier cured epoxy layer, I demarcate the surface to be glassed with masking tape all around, at least if I am in the mood for accuracy. This makes the edges neater and easier to sand smooth later on, and lets you get rid of any disciplinary issues around the edges:
Let the new layer of fibre glas reqch out over the tape. Apply epoxy well out on the tape but not on the outside of it. After a few hours, when the epoxy is semi-set, cut the glass along the inner edge of the tape with a realy sharp blade. The cut-off ribbons of glass fibre will come off nicely as the tape is peeled of and the tape has protected from getting epoxy on non-intended places. Distinct, clean, neat and no mess!
If you want to be really refined, apply another line of masking tape outside of the first line to keep the next epoxy layer witin its boundaries, but most often I find this a bit too diligent. - When working close to a cut fibre edge, I use a brush where I have not cut the bristles. Shorter bristles makes a stiffer brush which will increas the risk of messing up the edges. At least I think so, but sometimes it seems to be the other way around…
- To initially wet out the glass I use an appropriate* amount of epoxy on the brush and place it carefully with its flat side onto the fibre and let it rest there for a few seconds to let the epoxy transfer from the brush down into the fibre glass.
*Too much epoxy in the brush creates a puddle of epoxy which will be difficult to lift away without messing up the glass, too little epoxy and the glass is not wetted out sufficiently, making it stuck to the brush rather than to the surface below.
Finally, I roll the brush of the glass as opposed to lifting it straight, thus decreasing the risk of pulling tassels out of the fibre glass edge. - I never drag the brush out over the edge of cut fibre, because then the mess arrives like clockwork.
Amendment 2019-07-02: The more I get used to working with fibre glass as the project progresses, the less of a problem cut fibres turns out to be. At the end I coulc breach most of the protocol above without getting into trouble. But since those dos and don’ts was of great help to me along the way, they could probably be helpfull to someone else in the same situation as well.
It is important to get rid of any and all glue residues from tape before continuing the work! This does not seem to be an issue with masking tape since it is made for paining applications and does not generally leave residues, but other kinds of tape is not that forgiving.
By accident, I once used some sort of packaging tape instead of masking tape, which led to that the following epoxy layer did not adhere but had to be fully removed.
Don’t try to sand the glue away, you would only smear it out over a bigger surface. There are solvents to use, but find one that works on the particular type of glue to remove, and be careful since solvents are generally not good for your health. Apply any protective measures recommended.
Don’t over-work with too much epoxy at this stage
It is of no use to waste time on more eposy layers and sanding to get the final finish of the hull at this point in the project, i.e. before you have assembled the deck with the hull. When the fibre glass bands over the joints has been attached there will be more epoxy and sanding required to level them out, which makes any finishing work pointless before that stage, it only builds up an unnecesary thickness, and wheight, of epoxy.
Especially on a kayak with mainly plane surfaces, like the Black Pearl, you must fill out for instance the entire aft deck to the level of the glass reinforcement to get it completely even. This was the second don’t-ever-do-like-this-again moment in this kayak building endeavour: I was spending enormous amount of time getting the surfaces plane and even after joining the deck and hull, even if I already had spent a lot of time on the surfaces of these parts before joining them.
On a more rounded type of kayak you would be able to cheat a bit by only adding epoxy over and next to the glass reinforcements and then sand it even. There will be a thicker layer of epoxy directly over the reinforcements than on the rest of the boat, but this will not be noticed in the final result since it will be obscured in the overall rounding of the kayak..
What you should do is to put on as little epoxy as possible when laminating the fibre glass onto the boat and leave everyting having to do with final finish to the last step right before painting/varnishing.
However, it would be a good idea to add enough layers of epoxy to fill out the web structure of the fibre glass. Because when the epoxy has cured beyond a certain point you should lightly sand the surface with a 120-grid paper in order for the next layer to bond properly. And if you have left an uneven web structure you will only sand on the ridges of that structure but the epoxy in the lower areas will remain unsanded, giving inadequate adherence between the earlier and later layers.
Fibreglass on concave surfaces
On the outside of the hull and other konvex surfaces, it is quite easy and straight forward to flatten out the fibre glass by stretching it over the surface when scraping out the epoxy.
On concave surfaces however, such as the inside of the hull, it is considerably more tricky since when distributing the epoxy by scraping, you pull the fibre glass which forces it to ”cut any corners” and tends to lift it up from the surface. For the same reason it is difficult to press out all the air from underneath the glass. I have several air bubbles in the flooring of the kayak as a consequence of this. Some of them I corrected with cutting and patching afterwards but others are left as is.
I think that the trick is to not fuzz about too much. Wet the fibre, let it set for a while, scrape off the excess, brush down the fibre glass back down in the corners where needed. You are done, stop fiddling!
I iterated numerous times, scraping, brushing, scraped some more, had to brush again…
In that way you can keep on forever, and it gets worse rather that improving the more you dabble with it.
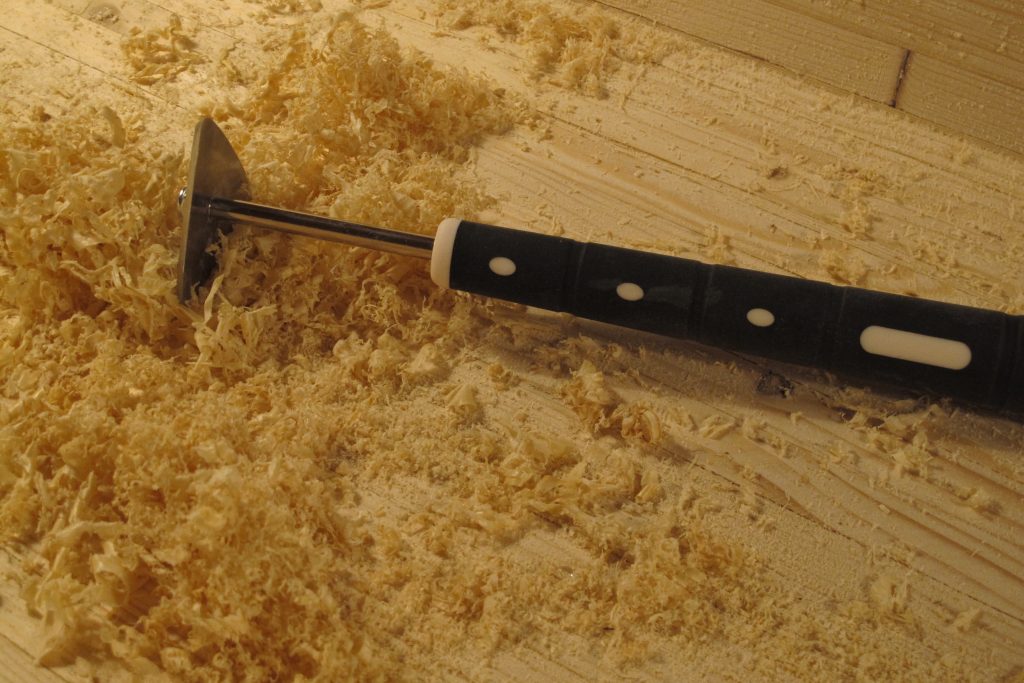
It is probably worth the effort to experiment with finding a suitable epoxy scraper. On the outside of the hull I used a tool intended for wallpaper, which was relatively hard and had a rounded edge that was gliding smoothly over the surface and disrupted the fibre glass minimally.
This scraper was however too big to use on the inside, so instead I applied a smaller rubber one which turned out to have a higher friction and therefore tended to pull the glass more. Eventually, I sacrificed my wallpaper-tool by cutting it down to a reasonable size, but by then the damage was already done.
Workshop temperature
This does not primarily relate to you freezing during your work, but to the temperature’s effects on the epoxy work.
Epoxy cures slower the colder it gets. I don’t have any expertise on this but on my own, Björn has written about it on his site, but in my opinion room temperature or slightly warmer is best suited for epoxy work. As low as 15 degrees centigrade is acceptable but that is as low as you should allow yourself to go.
There are two reasons for this, apart from you getting a cold:
Firstly, project planning and work efficiency goes down the drain since the curing time for the epoxy becomes completely unpredictable. You intend to continue with sanding, or whatever your next step would be, the next day but then it turns out thay you will have to wait a week for the epoxy to set sufficiently. Which is a sad surprise, especially if that was the only week for the next two months were you actually had time to spend on your kayak project.
Secondly, which is more significant, the strength of the lamination decreases the colder it is. It is probably primarily the bonding between the different layers that will be inferior, but also the internal strenght within each layer, the chemical bond will not establish at it is supposed to at lower temperatures. This can cause delamination, i.e. that the different layers detach from eachother when put under stress, which in turn would severely decrease the durability and strength of the finished kayak.
I have got some air bubbles showing up when the hull gets warmed up by the sun that I can imagine beeing partially caused by the temperature in the workshop during the epoxy work. I can live with the bubbles, but it could also mean that the entire hull is so weakened, invisibly, that it collapses one day when I meet a particularly fierce wave, what do I know.
Heating up an uninsulated cold workspace during the entire epoxy work is, if nothing else, very expensive in a nordic country. So either find an insulated and heated space for building or refrain from epoxy activities during the colder periods.
Joining hull and deck
Not much to say about this, but it is more efficient to spend time on planing, scraping or sanding a good fit between hull and deck than to spend even more time on filling the gaps in the joint afterwards.
Use a sufficient amount of glue (thickened epoxy) since it is easier to whipe of excessive glue after the joint has been pressed together than to fill in the missing parts afterwards. In addition, after-filling will result in a weaker joint. Use a single use piping bag to apply the glue, this is mush less messy than using a stick or a brush.
Make sure that the tape you use for pressing the hull and deck together is reinforced. I used what I thought was such tape, but it turned out that I was fooled by a cosmetic plaid pattern in the surface of the tape. As a result, the tape ”creeped”, i.e. lengthened under the tension so that the joint separated after a few minutes. Fortunately, I discovered this in time for mitigating it before the glue had cured.
And remember what I said above about glue residues from tape! Reinforced packaging tape would likely have more nasty glue than masking tape, so clean any surface you might have taped before continuing with sanding and more epoxy.
Miscellaneous
Some smaller issues that does not fit into the sections above but which I think deserves mentioning:
- With the type of hatch I implemented (RWO screw-out plate), which is quite stiff, an over pressure is created in the storage comartements at warm weather, which pushes the hatches ourwards, making them difficult to unscrew when opening them. If pry-out hatches had been used this effect could theoretically have led to the hatches beeing accidentally pushed open.
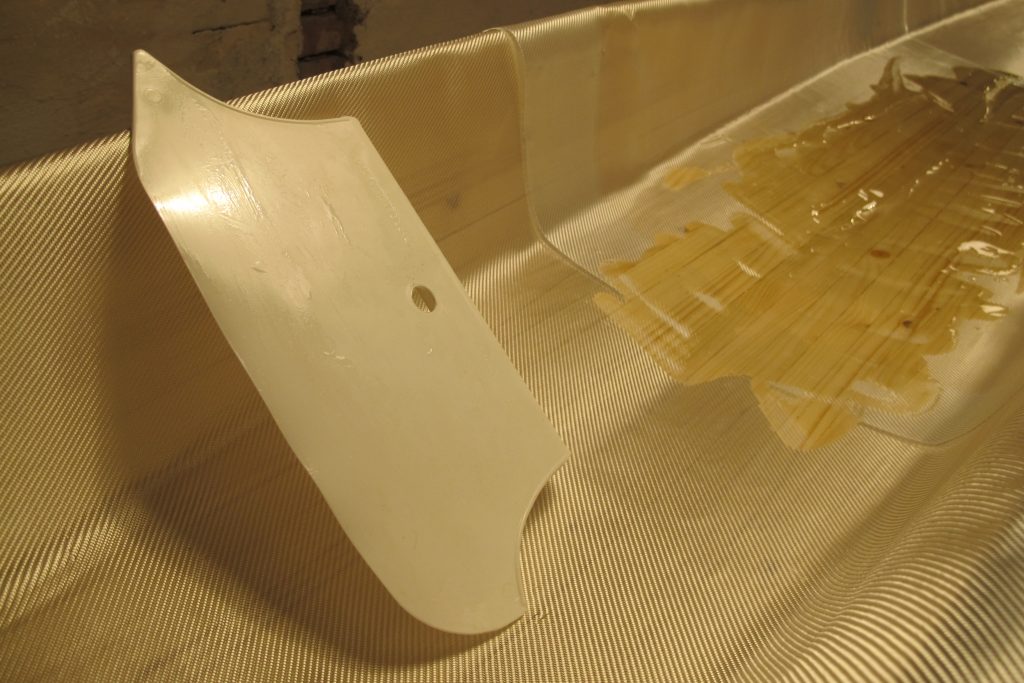
I have read somewhere that this can be prevented by drilling a very small hole, maximum 0,5 mm, in the bulkheads separating the cockpit from the storage compartment, leveling the pressure in the compartments without any significant amounts of water leaking in. Intend to test this as soon as I get my hands on a small enough drill, this is not available at the local hardware store. The problem in my case is that I have built the seat and back support in solid cellular plastic so the aft bulkhead is not available from the cockpit. - You would probably not like a cockpit coaming too high, but it could be a good idea not to make it too low either since it is difficult to access underneath the lip to laminate fibre glass and to sand. Either you must be prepared to spend quite some time with this, or accept that the finish will not be optimal in this recess. In hindsight, I would have made things much easier for myself by increasing the coaming heigth by a few millimeters, 5 at the most.
If you laminate the coaming in carbon and glass fibre I can imagine that this problem decreases since the surface should be smoother from the beginning, compared to a wooden coaming that you try to cover with glass afterwards in the small space between deck and flange. - From the top of my head I do not recall anything more right now, I will come back to you if something else turns up…
This was the very last post in the category ”Black Pearl 2018”.
I’ll be back in connection with my next project, maybe under the category ”Frej 2019”. We’ll have to wait and see, but drawings are ordered.
Lämna ett svar