

I am about to build a Black Pearl!

Click the picture to be forwarded to his description of this kayak.
The first time I ran into Björn was when he displayed his watercolor paintings in Halmstad, this must have been in the early nineties. A lot of the compositions included the sea or even kayaks.
I cannot really recall whether this happened before or after I got my first kayak, the Bavarian Das Boot which you can read about on another page. Maybe it was Björn’s paintings that inspired me to purchase it?
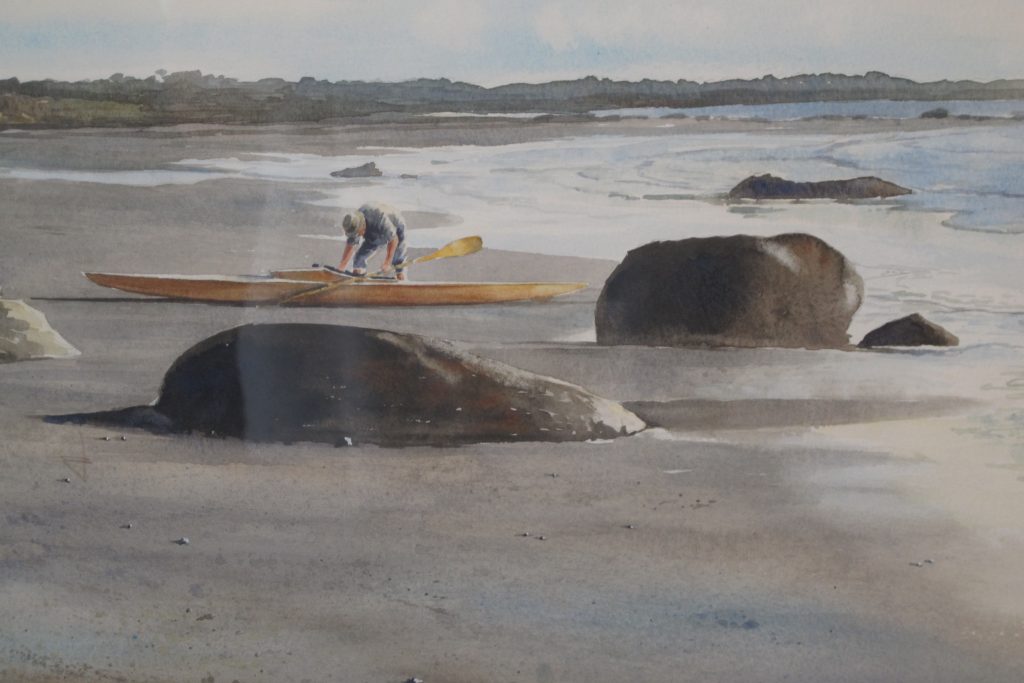
I actually bought a canvas from him, even if he was not personally there if I remember correctly. You can see a section of the painting to the left.
As a matter or fact, this painting has significantly contributed to maintaining my interest for kayaks over the years. Since it has always been on a central wall in my home, I have been able to hold on to the feeling of being a kayak-person also under the extended periods of time where kayak activities have been dormant.
At Björn’s art exhibution, his self-built kayak was also on display. I was totaly blown away by the insight that you could actually build a kayak out of wood and fibreglas, and immediately felt a strong sense of desire.
Apparently you could buy drawings from Björn and build such a kayak yourself. So that is exactly what I did. Buy the plans I mean, never got around to the building part though.
I still have these drawings, looked around a bit and came across them in my workshop. There was no name to the kayak design, the heading was the generic designation Kajak 500×56. I guess maybe this was Björn’s first, and at the time only, design and that it therefore didn’t require a specific name to discriminate it. It does not immediately resemble any of the kayaks in his present catalogue, primarilly because it has a small ”cabin” in front of the cockpit, to provide more space for legs and other stuff. Presumably this was designed to be practical when he paddled around wanting his watercolors close at hand?.
Amendment 2019-05-22: After additional investigations on Björn’s webpage I have concluded that this Kajak 500×56 was a predecessor, or maybe early version of, his present model Kavat.
The next time I heard about Björn was 20+ years later, when I had bought my first real kayak, a Prijon Marlin from från Verkö Kajak. As I started surfing more actively (literally speaking, on the net) for information on kayaking, I almost immediatelly came across Björns site which contains loads of valuable information. He turned out to be an authority on the use as well as on the building of kayaks. And I thought he was an primarilly an artist. But kayaks are artwork, aren’t they, at least Björn’s…
I realized that he even had a wide range of kayaks of his own design and was selling drawings to home builders. All were very beautiful (all the kayaks that is, the home builders I know nothing about) and designed with clear intentions, but one of them stood out in particular, catching my interest. That was Black Pearl.
She seemed too advanced for my limited paddling skills, but I was convinced that if I am going to build a kayak, this is the one. The paddle skills will simply have to catch up.
I even imaginged that getting a kayak slightly too difficult for me could be a helpfull motivational factor in becoming a better paddler.
In 2016, I purchased the drawings with the intent to build during winter season 2016/2017. Didn’t build anything during 2017/2018 either, but now I aim for at least starting the project before the summer of 2019.
Amendment 2019-01-01: My aim was adequate this last time, in the shift between 2018 and 2019 the outer side of the hull is completed, with epoxy and everything. If this will lead to something that is usefull for paddling before summer of 2019 remains to be seen.
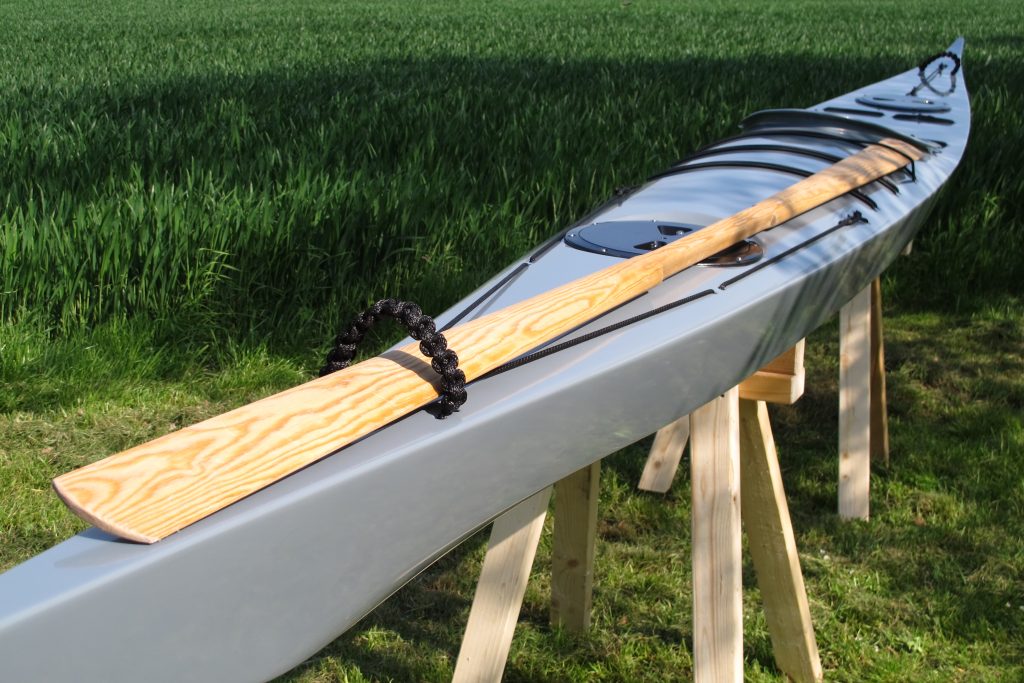
Amendment 2019-05-23: The Pearl is actually ready for launch now! I have added a few sections on this at the end of this post.
My thoughts and plans before starting
Since this is my first time building a kayak, I first and foremost see it as a learning project and will try not to be too creative. Follow the manual, don’t make it more difficult than necessary.
I will paint the kayak, probably in black. Partially since it’s name and looks invite opaque painting rather than exposing the wood. Partially because it seems smart to practise on the strip technique before challenging a varnished kayak. It would probably be a disapointment when beginner’s mistakes cannot be covered up with paint, visible wood will be an issue for kayak number two.
Some type of off-the-shelf hatches will be used. Probably Beckson twist out plates, I think they look good on the Black Pearl and I am no fan of rubber hatches. At some point I would like to build the hatches myself, but again, not in this first project. Better to get it finalised within a reasonable amount of time and get a hang of the basics than to get into an eternal project that will still not be a 100% due to lack of experience.
The decision causing me the most headache is whether I should install an adjustable skeg or not.
On one hand, I would like to learn to handle the Pearl without a skeg, and in that case it is unnecessary to waste effort on someting I do not want anyway.
On the other hand, I don’t want to end up with a kayak that I cannot handle well enought with a reasonable effort. I want the absence of a skeg to be an adequate challenge, not something overwhelming that will make me loose all motivation.
Ok, I know, I don’t have to use the skeg if I don’t want to, so why not play it safe and install one just in case? But, as said earlier, I want to do this as simple as possible. And, by not building a skeg there is a moment of ”throwing the dice” which inevitably forces me to develop my paddling skills and removes the possibility to use the skeg out of lazines.
In the last moment I decide to leave a skeg out of the equation. I have had my rudder-less Dagger a couple of years now and learnt to handle it better and better. The skeg is more or less unavoidable, to me at least, on that kayak with its pronounced rocker, but I have deliberately under-used it quite often just for practise. So I think, or at least hope, that a Black Pearl with its low quarterdeck and long keel will be managable without a skeg and present a finely tuned amount of challenge.
You can follow the progress of my building project, if any, here on my blog, posts are found under the category ”Black Pearl 2018”.
Please observe that the blog is only intended as a diary from the building process,
which occasionally might reveal some potentially useful experiences.
The blog is NOT a building manual!
Consequently, basic descriptions and explanations of the different building steps are not provided, simply because I am not qualified to give such instructions.
When I reflect what and how I do things, I do this in relations to Björns building manual, meaning that you should probably have access to that publication or have previous experience from strip building in order to follow my posts with reasonable ease.
Along the way, I have noticed that my building diary is quite inconsistent. Sometimes I write extensively, sometimes short, sometimes there are a lot of pictures, sometimes not. And, as it happens, sometimes the wording reminds more of a manual than of a diary.
None of this is intentional, it merely depends on how much effort I can put on the blog for the time beeing.
Well, you have to live with these inconsistensies. My primary objective is to build a kayak, the diary is just something I do for fun when I find the time for it.
My thoughts after building is completed
Directly after finalising this building project 2019-05-22 I am very pleased. Some things ended up better than I have dared to hope for, other things made a fuzz and needed longer time than expected. And yet other things didn’t turn out to my full satisfaction. But overall, thumbs up.
The total numbers of man hours spent on building accumulated to 150 or thereabout. Taking into consideration that some stages felt like going on for ever, I was positively surprised when I summarized the excel chart in which I have logged the time.
The weight of the kayak ended up at approximately 20 kg. Significantly more than what is necessary, but less than any of my plastic kayaks. I had feared worse considering the amount of epoxy used to cover up the fibreglas reinforcements over the deck-hull joint, I must have sanded relatively efficient after all.
Since I didn’t have the goal to build a light-weighter, I actually don’t care as long as the figures aren’t catastrophic, which the aren’t. At least not in my book.
My ambition level was not to aim for perfection this first try, but to keep expectations reasonable and go for perfection in the next project when I have learnt from my beginner’s mistaktes.
I succeeded partially in this, but I couldn’t live with the consequences of my low ambitions in all cases. Sometimes when I saw the result of ”intentional negligence” from an earlier building step, I couldn’t really accept it but spent time readjusting things that would have been much quicker to do better the first time.
When I see the end result, it sometimes bothers me a bit that I didn’t go for perfection. It is almost there, and with a reasonable extra effort it could have come all the way. But then the launch would likely had been postponed for some time, so I still think I had my priorities straight. There will be more building projects with better conditions for obtaining perfection…
The only thing that really bugs me is a sanding failure on the deck by the cockpit coaming. When I used the cabinet scraper to remove a drip of paint in the cured enamel of the final coating, I managed to go through down to the epoxi. Re-painted a section of the deck, but it is difficult to get a good result when in a self-induced restless hurry.
When sanding the new layer of paint, oops I did it again. And since I was impatient enough to start off with 240-grit sandpaper on the new top layer, which is utterly stupid, I also created some severe scratches that will be impossible to remove. Back to square one, more paint, and some skillfull sanding this time.

But now I just want to get the kayak into the water and not spend any more time on painting and sanding. It will have to stay this way until winter season when there might rise an urge for restoration, maybe.
All in all, an extremely satisfied first time builder looking forward to the maiden voyage with great expectations.
What if i don’t manage to keep her right side up even for a second, that would be an anticlimax to write a blog post on!
Launch and maiden voyage
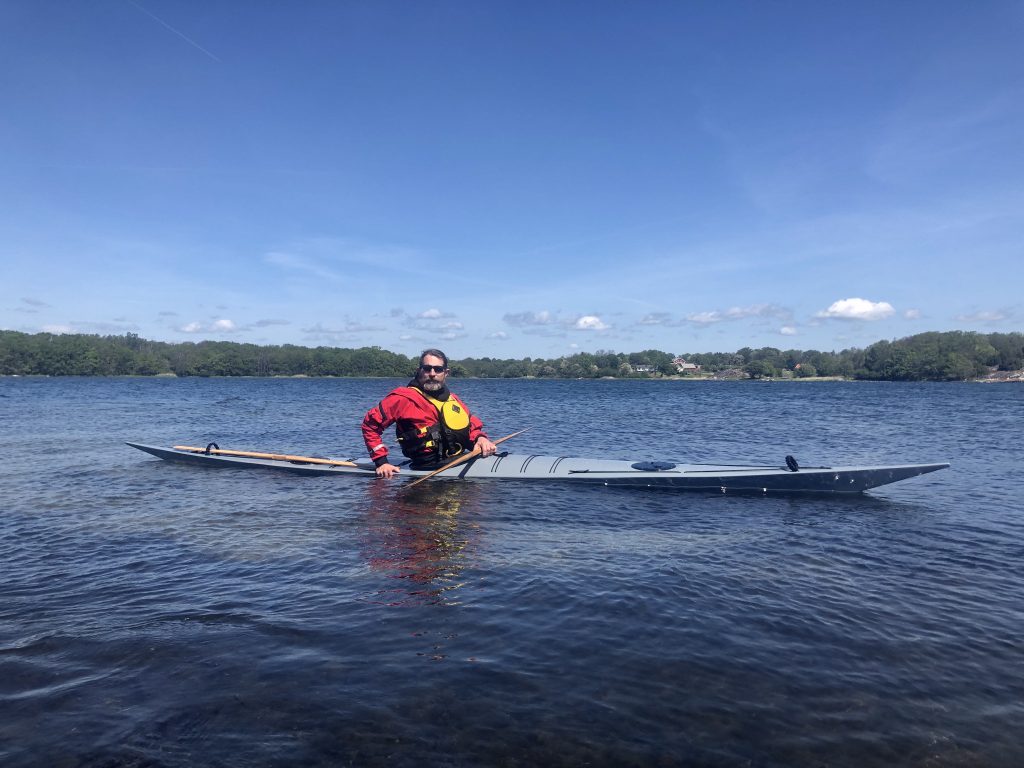
These activities took place in she shift between May and June 2019, in a most satisfactory way. Details are provided in a separate post.

Lämna ett svar